


REMkings
-
Posts
21 -
Joined
-
Last visited
Content Type
Profiles
Halo Articles
Forums
Events
Gallery
Books
Movies
Posts posted by REMkings
-
-
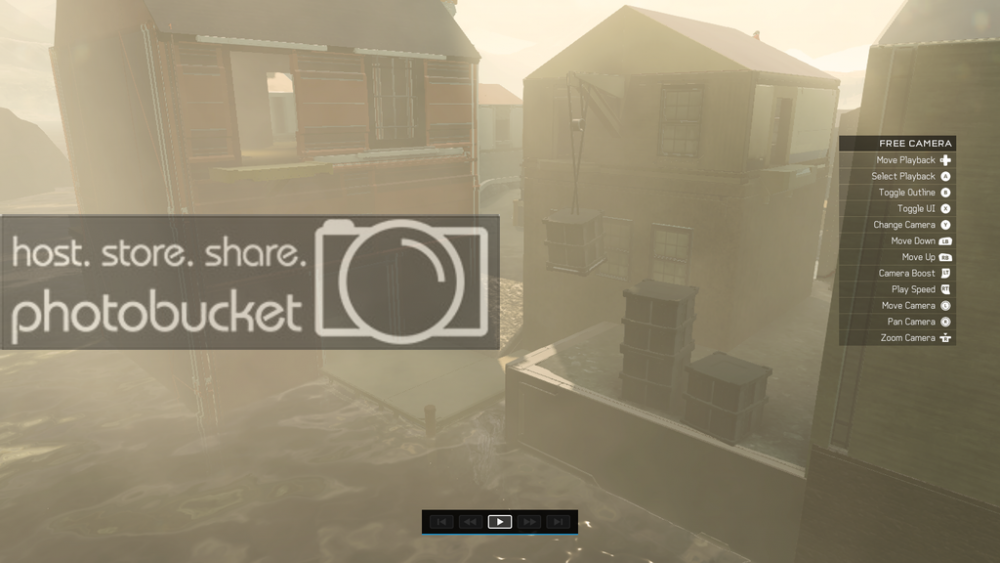
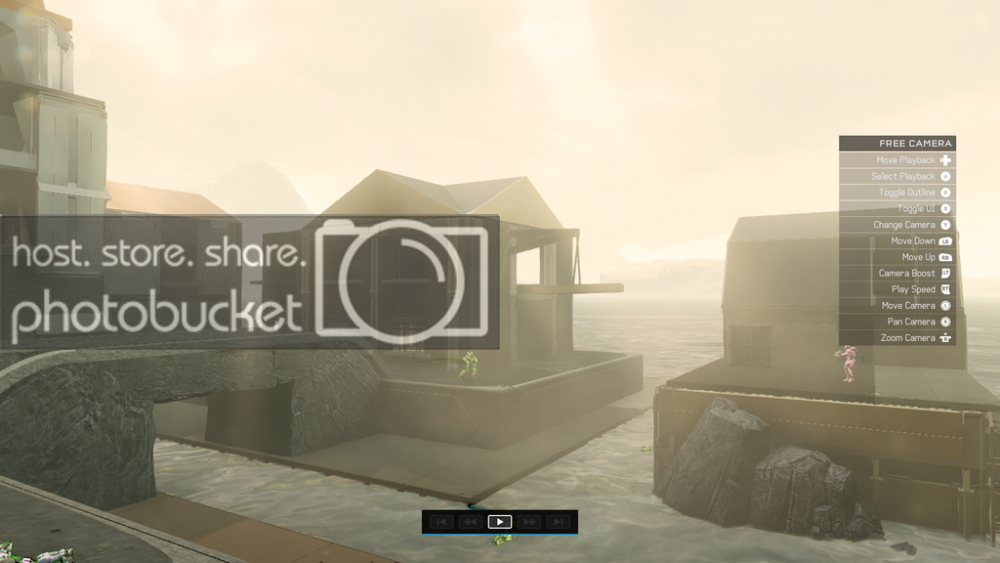
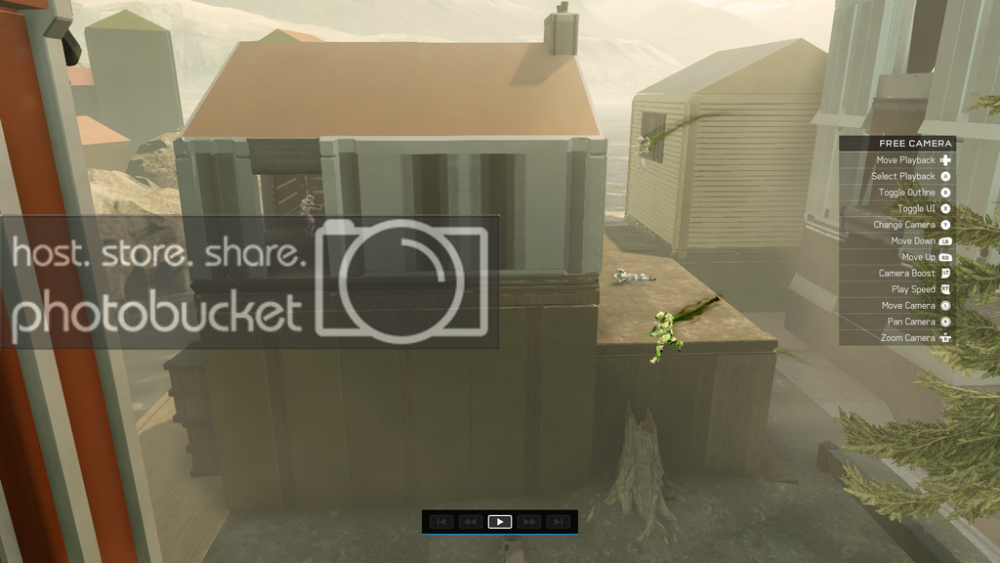
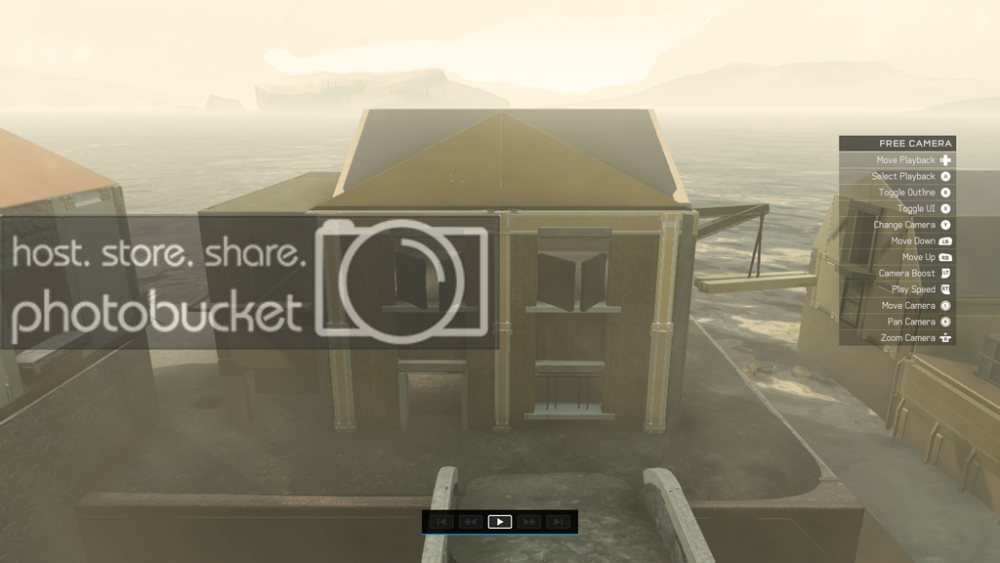
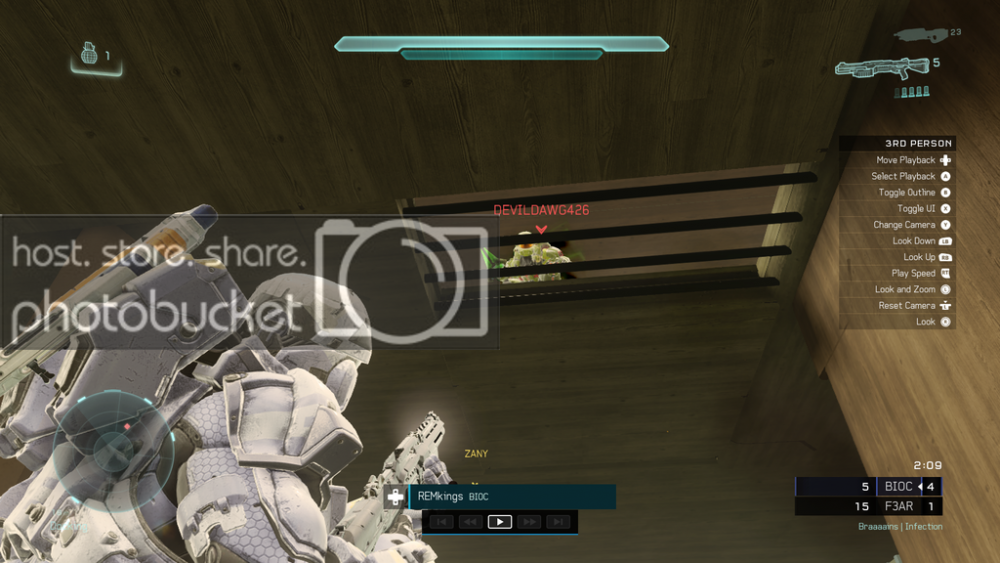
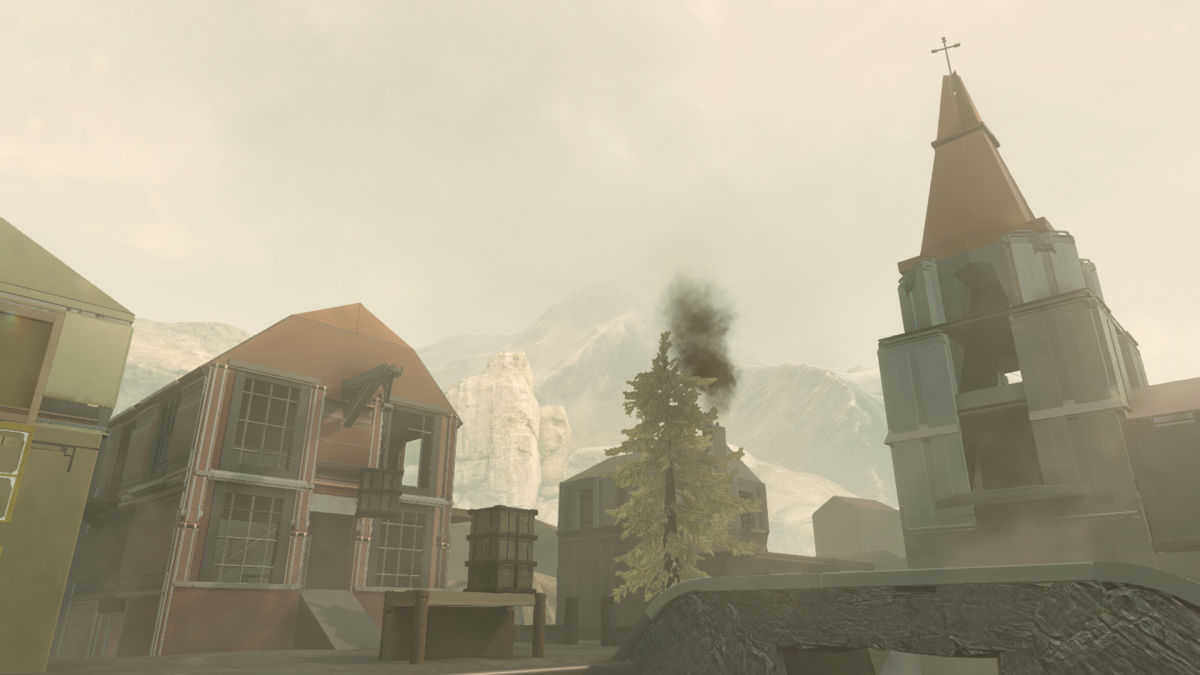
"Morgan Bay, 1773. The ever so peaceful port now houses a horrible rebellion..."
Welcome to Freeman Bay!
DOWNLOAD LINK
Freeman Bay is the successor to my map 'Morgan Bay', a map that I forged back in Halo 4. Morgan Bay has proven to be one of my most popular maps to date, winning Best of Forge 2013 and making its way into Matchmaking.
Therefore it was only a matter of time before I would try and bring back the map, only this time giving it a face-lift using the amazing new forge tools.
This map supports from 8 all the way up to 16 players, but I find 12 players is best. It is to be used with the standard Infection gametype from Halo 5.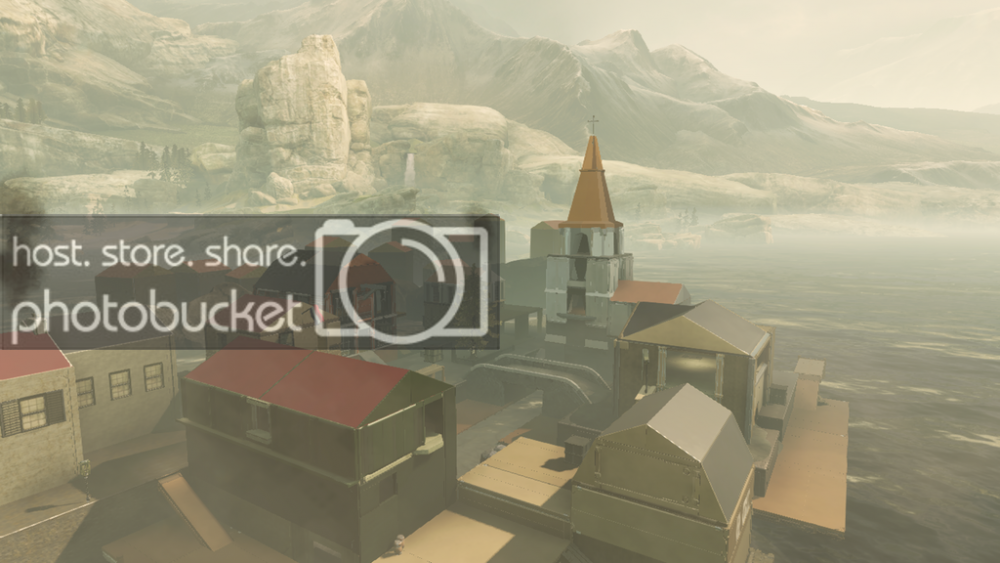
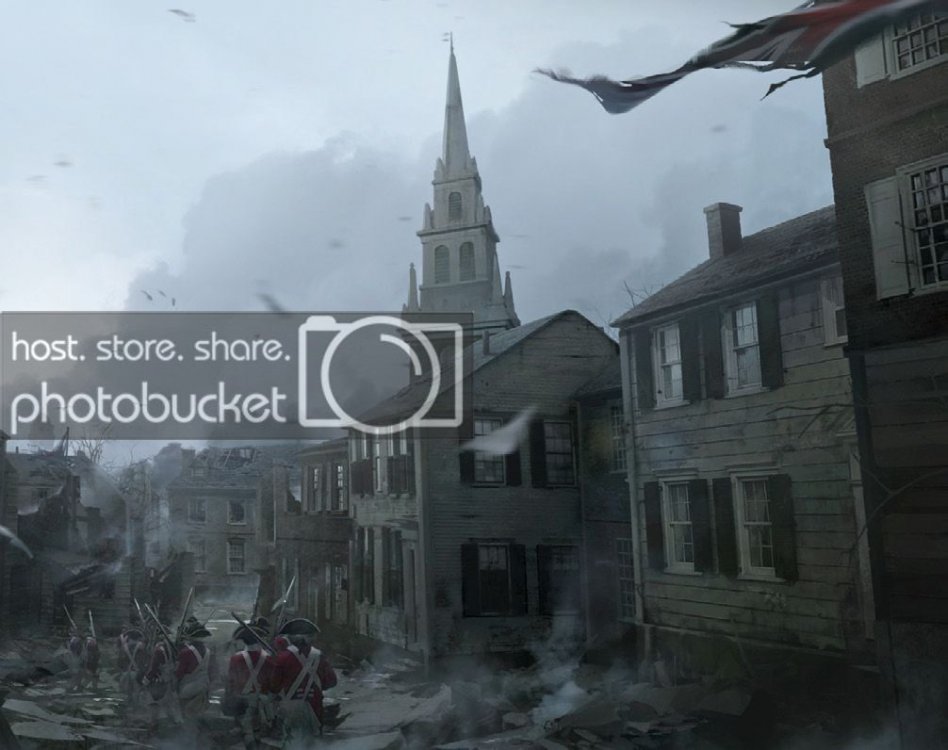
Inspiration
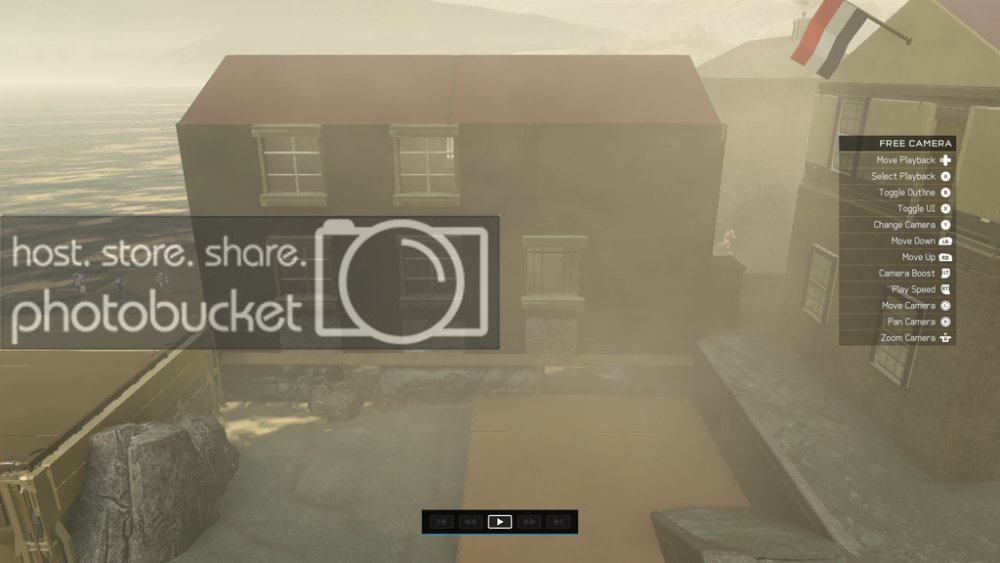
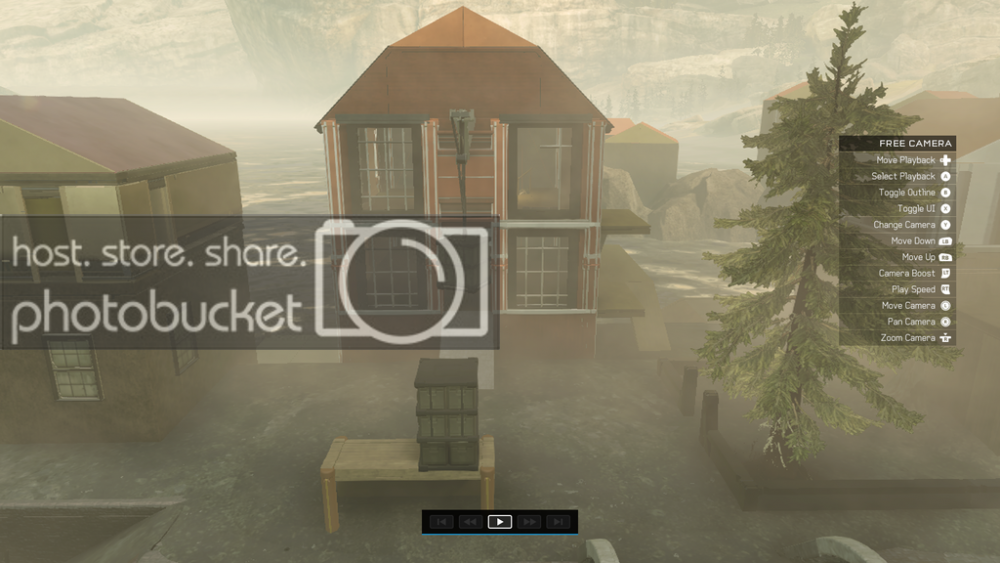
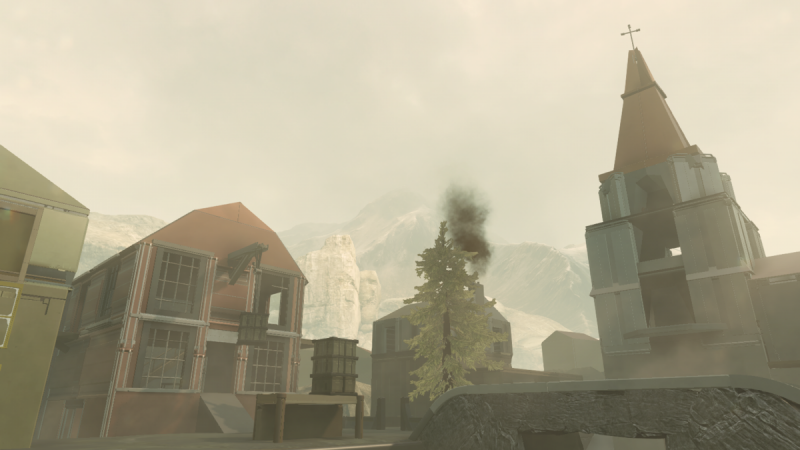
Morgan Bay was inspired by the typical ports you'd see in Assassin's Creed III. Obviously the same goes for Halo 5. I've gone ahead and looked at pictures from old Amsterdam as well, and hinted at this usage by implementing a Dutch flag in the map. I'm glad the theme is generally speaking instantly recognized, as I've had many people ask me if it was inspirted by AC3.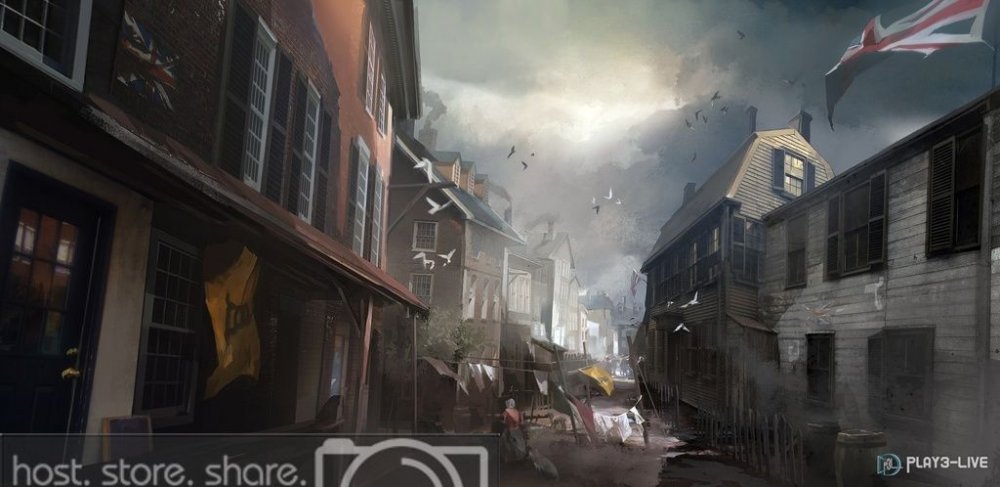
Philosophy
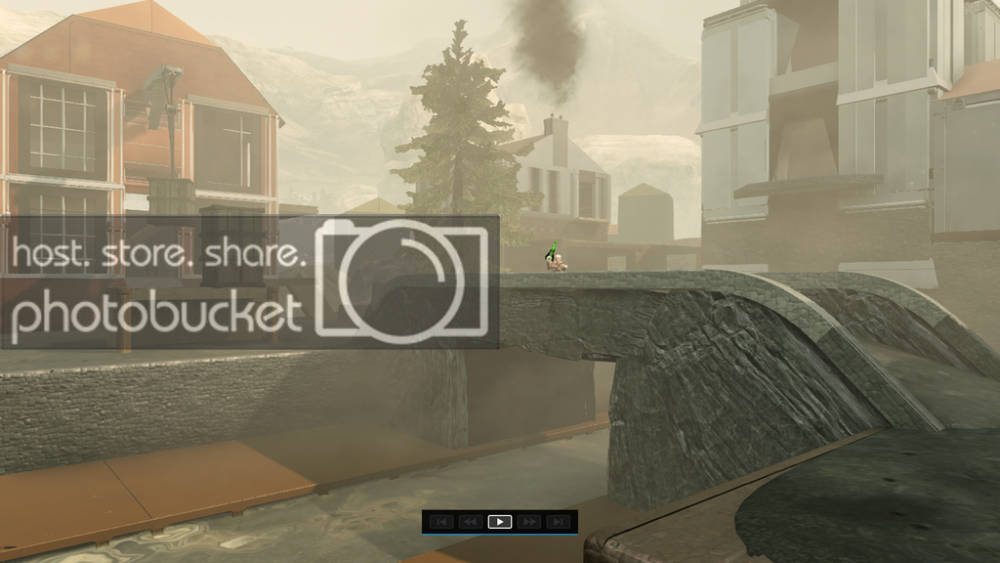
Freeman Bay, just like its predecessor, isn't just any map. Many, many hours have been put into improving the gameplay value and turning it into a fun and balanced map. As a result, the map has well balanced and interconnected holdouts that make for great flow. There are plenty of flanking routes and ways to quickly traverse between the separate areas of the map. Whether you're a human or a zombie, you're bound to have a great time on Freeman Bay.
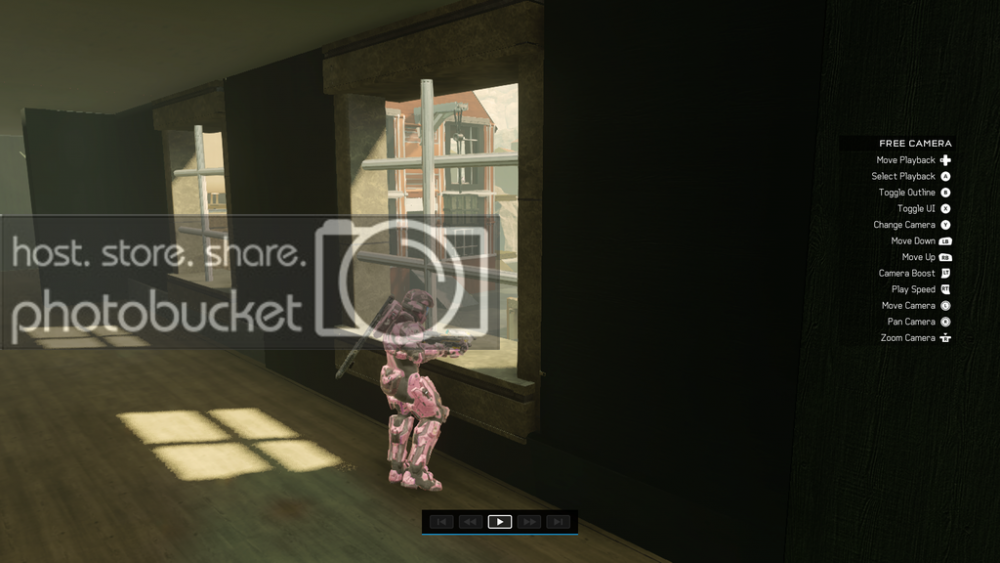
Teamwork
As I always make sure I do, teamwork is of tremendous importance on Freeman Bay and proves to be a necessary means to survival. The only way to see the end of the day is to team up with your surviving buddies and fight your way to victory.
This is brought into practice by the many buildings on the map that are all within each other's sightlines through windows and balconies. It is highly recommended you try and keep as many of your fellow survivors alive by supporting them from afar in defending themselves against attacking zombies. They will likely do the same for you.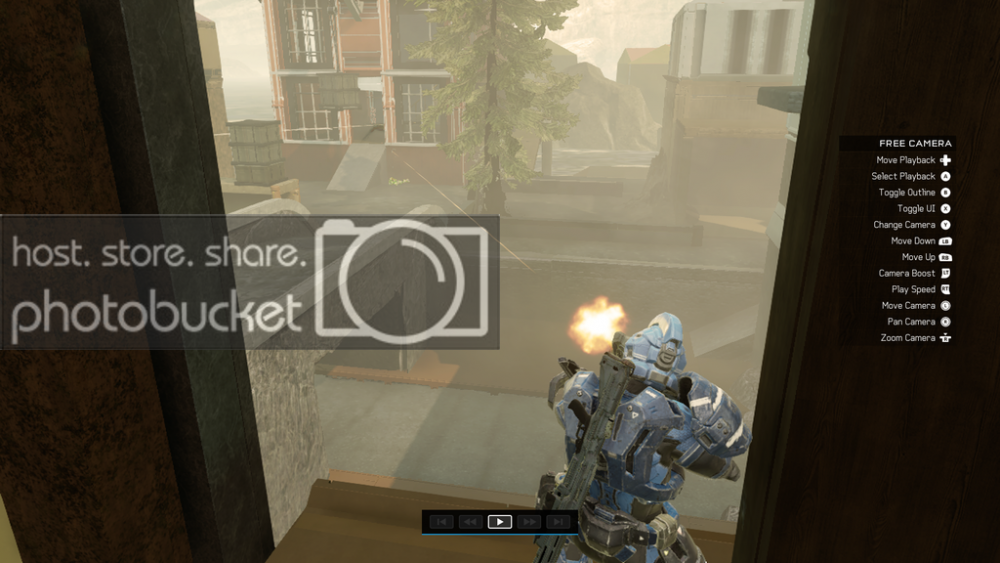
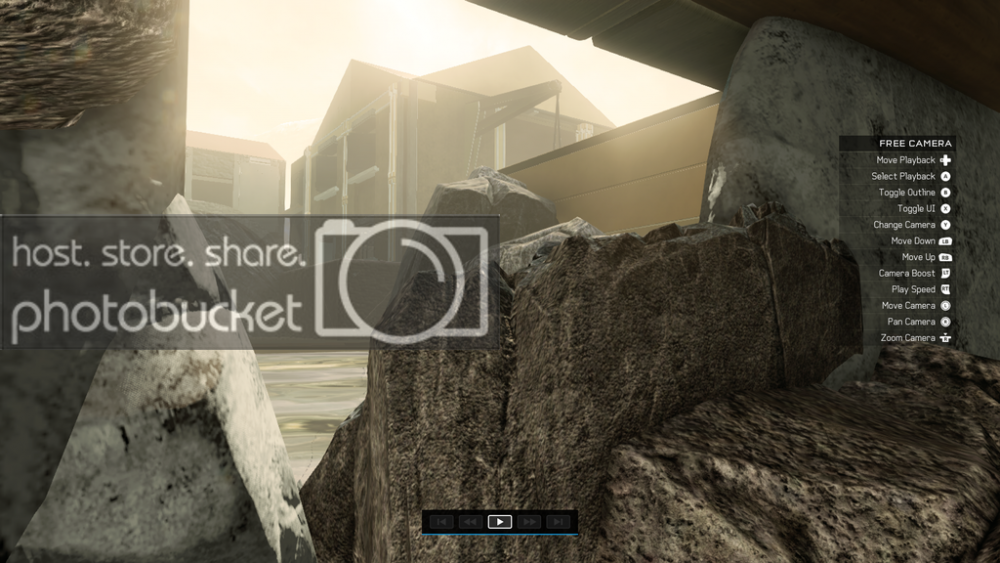
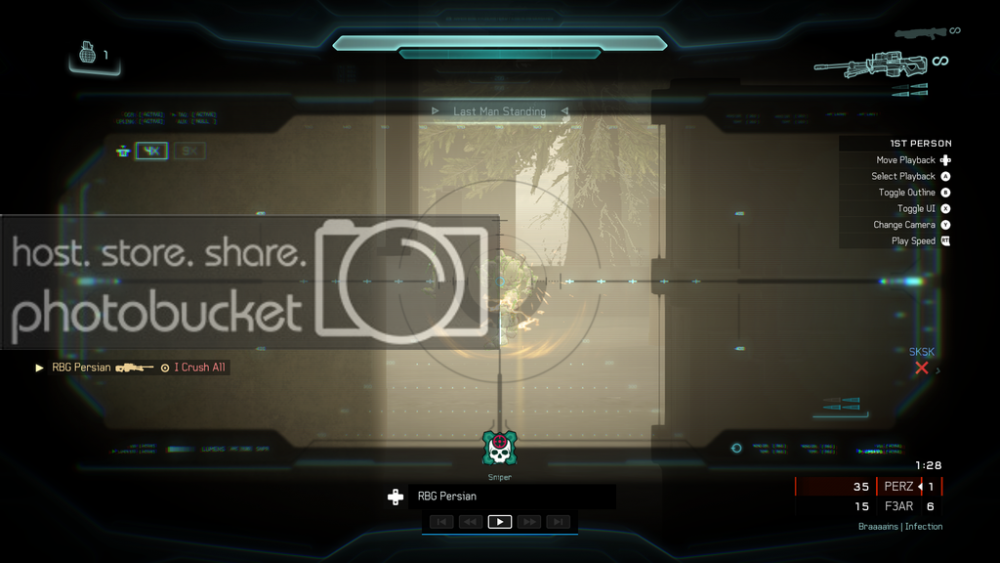
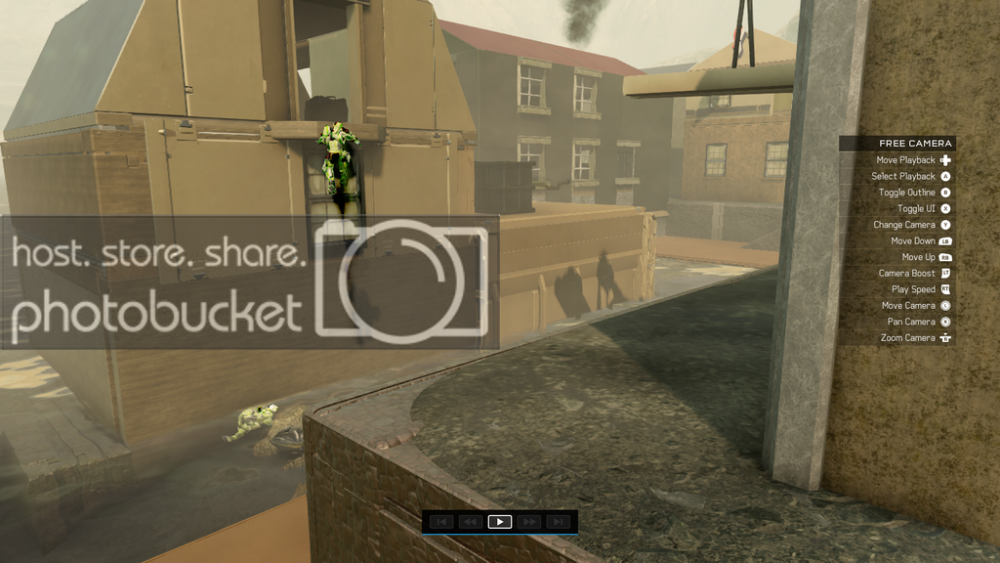
Additional Pictures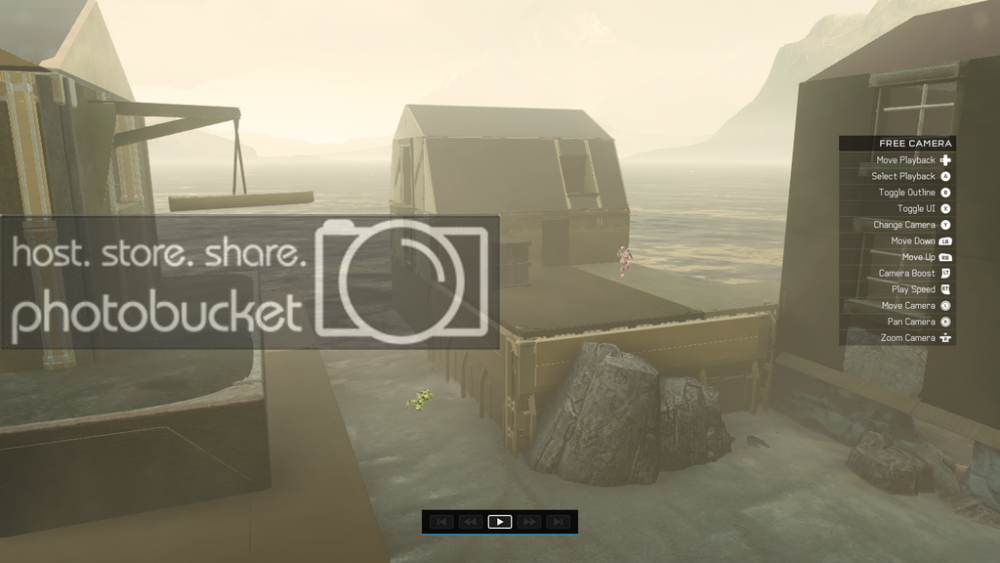
Epilogue
Thank you all for reading, I hope you like the map and give it a download! Let me know what you think down below and leave a rating if you will.- REMkings
- Special thanks -
WARHOLIC
PA1NTS
WyvernZu
The 0micron
Auxi Klutch
CommanderColson
CANADIAN ECHO
Zandril S312and the many others that helped me test this map once or more, gave me helpful feedback or simply expressed their thoughts on the map
= DOWNLOAD LINK =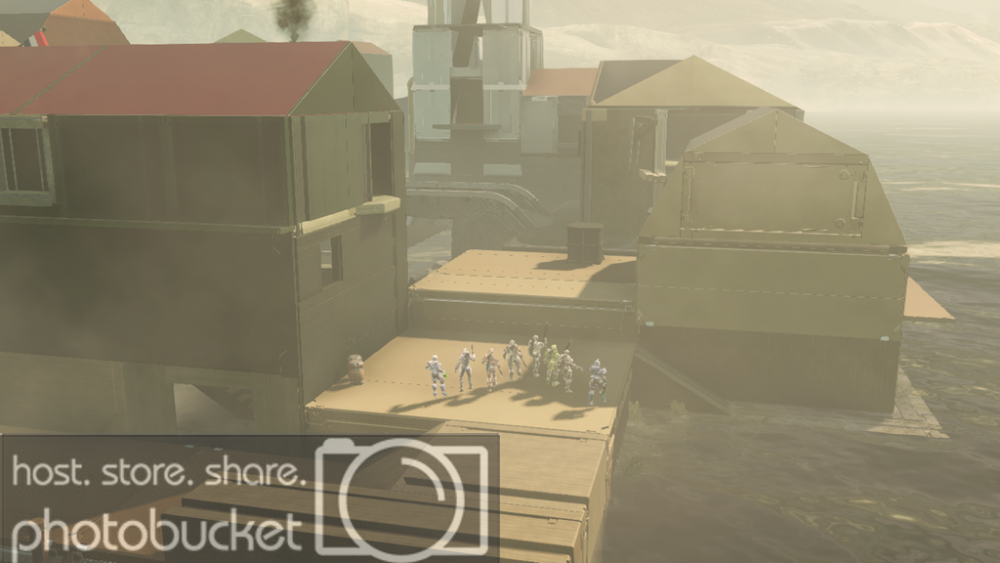
-
 2
2
-
-
Gamertag: REMkings
Map: When Running Fails
Gametype: On the Move
Recommend player count: 12-14 playersWhen Running Fails
They left the city with dozens, in the hope of hitting the road to salvation. Only few made it out. A small group of latecomers finally reached the highways, now in such a sad state of affairs that all chances of escaping seemed lost - leave alone any chances of survival. Or is there still hope? Team up with a buddy or two, board one of the remaining Warthogs and outgun the chasing undead. Prepare for a joyride.

"When Running Fails" is my attempt at a Drive or Die map, which you'd used to see a lot in previous Halo titels. Drive or Die maps, for those are not familiar with the name, typically consist of a large driveable area, which can vary from a huge desert to a long road, where the sole purpose of the game is to get in a vehicle and keep driving away from the zombies pursuing you. I myself am a huge fan of Warthog usage in Infection maps, so you can imagine I loved playing on these kinds of maps. Unfortunately, much to my regret, I have not seen any good Driving maps in Halo 4 yet due to the difficult-to-work-around-with layout of all 4 of the forge canvases.
It was therefore that I decided to give it a try myself. And now you're here to see the outcome.
Here are some self explanatory pictures for nom.


Important notes
There are two things you really have to keep in mind when playing this map if you want to get the greatest of pleasure when playing the map.
1. There is a huge trait zone just above the surface of the ground level. This trait zone only applies for humans and massively takes down their health, while also decreasing the damage they can deal to enemy players. In other words: this effectively dismantles attempts at camping. Because of the fact that all players have trait zones above their heads, zombies will quickly find you and take you down with ease if you're trying to break the game. So yeah, just get in a vehicle instead of walking around. It's more fun for everyone, including you.

2. I have used a modded gametype that allows zombies to sprint. This will come in handy when trying to keep up with the Warthog, so make sure to use this function all the way: you'll even have unlimited sprint.
3. There are some bumps in the road that couldn't possibly be smoothened out. These bumps don't effect Warthogs but they can slow down zombies walking into them. It is possible to keep running around the whole track without running into any of these bumps, though. Make sure to keep an eye on where you're running and you should be fine.
Tips
Finally, I'll give you some tips to apply on this map if you either want to increase your chances of survival or if you'd like to get some extra Infection on those nasty humans.
- Keep driving circles on the outer ring of the map. You'll be able to keep your speed at best, making it harder for zombies to chase you down. Also, generally you'll have great sightlines on the side, so zombies will have a harder time ambushing you.
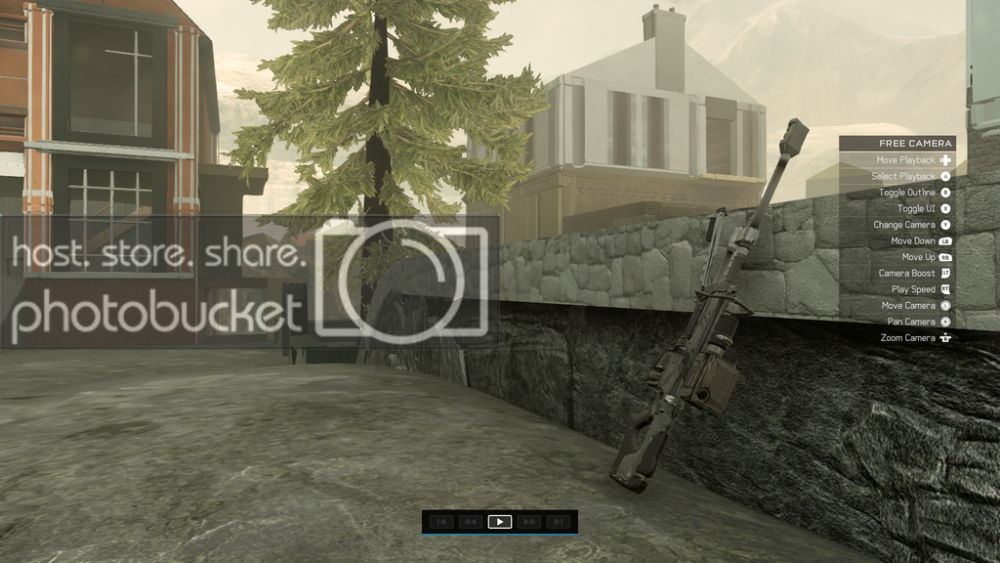
- If you happen to be riding shotgun, it is recommend to grab your sniper rifle and try to go for some no scopes on zombie players passing by. The auto aim makes it rather easy to pick up some kills, and it will also help out your buddy wielding the turret on the back, who in the crucial phase of survival will likely not be able to take on all zombies all by himself.
- If you're playing as a zombie; Make sure to keep sight on any humans (accidently) driving or walking around on the ground level. As mentioned before, they are now easy one hit kills and they also deal less damage, providing you a good chance of getting one or more sweet Infections and making the horde grow.
- If you're playing as a zombie; Try and flank the Warthogs driving around. This is usually accomplished best by cutting the humans off by estimating where they'll be driving next, and then hitting them from the side by surprise. This will likely slow them down or even turn them over, or in the best scenario even flip them on the side, making for a nice opportunity to leap upon this new gained meat together with your fellow undead.
That should be all! I hope you will have give this map and gametype a download and enjoy playing it. Whether you're a great fan of driving the Warthog in Halo or killing off zombies/infection survivors, you're bound to have a great time.

- REMkings
-
1
-
-
Destitute in Chains
Created by REMkings
Hello and welcome to my very first map in Halo 4, called "Destitute in Chains". This map is a reimagination of my first Infection map from Halo Reach, and also my most popular map in terms of both downloads, publicity and feedback: "Lone Souls in a Lost Mine".
Lone Souls in a Lost Mine (LSIALM) was my personal favorite map from the ones I built myself, because it was scary, dark and had a very strong theme. It was also highly focussed on teamwork and discouraged you from running and gunning, but rather drew you back to realize in what kind of frightening and hopeless situation you happened to be in. I simply had to bring it back in a new liveform to give back to all the people that gave me such great reactions about it and really helped me to improve my overall forging skills.
And that's where the story of Destitute in Chains begins. I wanted to use this project to get used to Halo 4's Forge mechanics and at the same time see what things were possible with the new Flood mode and what changed in relation to Infection.
Turning LSIALM into DinC
So, you remade this mine map from Reach. But why didn't you just literally remake LSIALM instead of only making a reimagination, REMkings?
Well, it is for four reasons that I did it this way.
1. It's more fun to only take parts from the previous map and add new ones. It's also more original than to simply remake everything, and makes it more of a challenge.
2. I wanted to use the new features from Halo 4's forge pallet such as dynamic lighting, the new blocks (pallets ftw!) and the addition of two lights to the previous amount of 2, thus having 4 lights at my disposal.
3. I simply couldn't literally remake it, because we no longer have Forgeworld and I had to adapt to the natural environment of Erosion. (Which was by far most suitable in my opinion.) The same goes for the looks of some of the blocks in Halo 4 that would no longer fit in a mine map because they don't look woody or rocky enough anymore.4. Halo 4's Flood mode also plays differently than Reach's Infection. I had to adapt the map to fit with the gametype.
In this map I brought back several of the key things that were present in Lone Souls in a Lost Mine. Such as:
The L-shaped room
The furnace
The elevator shaft
The elevator itself
The minecart
Some of the changes that were made in Halo 4 allowed me to make the map scarier than before. These changes include the addition of dynamic lighting, the fact that active camouflage now actually works the way it should, and the removal of health bars and -packs. I was able to combine all of these factors into a new thing that still reminds of its precessor, but also feels like a map of its own with a somewhat different playstyle. It plays best with around 10 to 13 players, but can support up to a full lobby of 16. (It might get laggy though, so that's why about 13, 14 should probably be max.)
For all of you that never played Lone Souls in a Lost Mine or never even heard about it: LSIALM was a map situated in an old and abandoned mine (though it turned out not to be that abandoned after all), that mostly focussed on cramped room setups and hallways resulting in frightening battles with the undead with a great deal of cooperation amongst fellow survivors or zombies involved.
There's not really much else to say, other than to direct you guys to a couple more screenshots as well as some video reviews of this map! Enjoy and thanks for checking out this map!
Finally, make sure to download the gametype (Shadows and Dust) as well: it will not be as much fun if you don't use it.Download the map - Destitute in Chains
Download the gametype - Shadows and Dust

- A special thanks to everyone who helped me test and improve this map. Thank you for helping me if you did! --
3
-
-
They literally gave me an orgasm.
Yeck.
lol, great map nonetheless. I like how you built the skyscrapers: they're so simple, yet so convincing and they really set the theme. Keep it up.
-
Wow, the well and the flowers look really good! Keep it up!
-
I enjoyed playing this with you and some other guys like Pol Wah yesterday, but I did have some concerns with this map.
First of all, there was one area in the map where you have pretty long sightlines and a crate which is somewhat blocking the map, but also allowed access to its top. You might remember this moment where a couple of humans climbed up on this crate and were able to hold off the zombies pretty well. It wasn't a huge issue because in the end we were able to flank them, but it could be an annoying exploitable spot that would hurt the enjoyability if players would discover and use it from the first round already.
Secondly, the map felt a bit flat to me. It was basically two levels and a couple of stairs and grav lifts connecting them, instead of using a lot of relief, open spaces or hight variation in the map. I'm not saying you should've implemented this because it can be tricky to pull off, especially in an indoor map like this, and also it does require extra forging and thinking time, but it would've been interesting to see open windows or little hills that zombies or humans or both could jump through or climb on, to change up the horizontal combat. Not too big of an issue though. And it's kind of hard to explain so don't be bothered too much.
Other than these things, this map is great. There are barely any broken sightlines (none, really, because the one I mentioned isn't too big of a problem because it's flankable), the theme is selling ("What is this doomed and dirty place and how did we ever end up here at a terribly wrong moment like this?" - Love that.) and the map feels a lot bigger than it actually is because of clever and impressive usage of both the natural environment of the map (everybody tends to avoid the tower so props for actually using it!) and of the different layers and levels you built yourself. It was also a really scary and intense experience playing on this map, which to me is one of the key factors of Flood forging and means you knew what you were doing when creating this map. Definitely a good map!
-
Another amazing map Pol Wah. Man you've gotten good at making these!
-
1
-
-
Thanks guys! I tried making both the bench (spawning area) and the picknick table realistic and original. I'm glad you liked it.
And GryffinGuy, that's really nice of you! It was indeed a great challenge to forge this map on Ridgeline, but I'm glad I pulled it off nonetheless. I was going to publice this map earlier but it took me months to finish it, because every time I tested it, there was something that needed to be tweaked a little. Not to mention, it was a true pain to get enough players with the Anniversary maps.

Anyway, I sitll hope people will download it, because it will be a great experience to play this map if you're up for a fresh Linear Progression map like you haven't seen it before.
-
Yay, the thread is finally finished!
-
Gamertag: REMkings
Map: Favela Run
Gametype: zm_Outbreak
Recommend player count: 9-16 players
Favela Run
By REMkings
"What do people do when the place gets flooded? They run to the roof."
ATTENTION: This thread doesn't contain all the pictures from the original thread. (It does contain the most important though.) Make sure to check that one out to learn more about the map.

Prologue
Finally. It's there. This map has been in the works for almost a year, originally starting as a co-forge between Beybok (Minion) and me, but due to circumstances (such as timezone differences) eventually turning out as a map that was forged solely by me and is now ready to be released. We have already made plans for an actual co-forge in Halo 4 though, when hopefully we will be working on a sequel of this map. But let's take a closer look at a map that proved to be a true pain in the ass to forge.
As the name implies, "Favela Run" takes place in a typical Brazilian favela, one of the many slums situated in the bigger towns of Brazil. They are known to be inhabited by the very poor, and accommodate lots of criminal organisations. However, in this favela things get even worse. Some rare and hazardous infection has taken the residents, and the few survivors left now have to make their way to the top of the favela in order to survive. For once, they are lucky to find so many weapons laying around in their already unsafe quarter.
Favela Run is a Linear Progression Infection map, which means the humans have to cover a specific route in order to reach the end of the map and - hopefully - survival.
Because of the fact that this map in general and the different holdout areas are really small sized and humans will already die after one hit of a zombie, the gameplay is really intense and hectic, especially when you already lose a couple of humans in one of the first areas of the map. The easy-to-go approaches for the zombies make for some speedy gameplay, and things tend to get crazier and crazier as you progress through the map. This doesn't mean you can't make it to the end, though. You'll find that team coordination will be key in order to survive: you can't watch all zombies on your own. Taking all the weapons for yourself is thus useless: you will survive as a team, or die a lone wolf.
Keythings
What distinguishes this map from other, similar Infection maps?
First of all, the fact that this map was built on Ridgeline. As some of you may know, Ridgeline is a very difficult map to forge on. Not only do you get half the budget of Forgeworld, you also have a limited supply of objects, there are many pre-forged trees in the way and there's a freaking annoying kill barrier above the map which will take you out again and again while you're trying to get that one block right. However, I believe that I managed to make a neat map, and therefore the satisfaction of finishing this map was even greater to me.
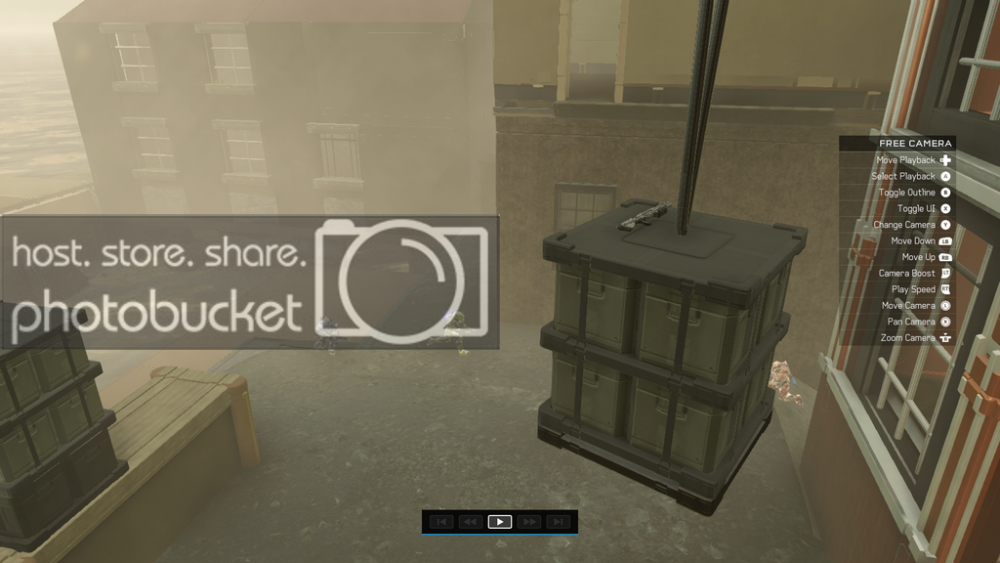
Secondly, this map has a great amount of weapons and tactics to offer. First of all, you'll find these grey boxes all around the map: (see picture)

These boxes will contain shotgun ammunition. Every time you see one of those boxes and you have the chance, definitely try and grab one of those neat shotties! You'll see that they are very helpful in killing off the undead.
Other than that, there are a lot of other weapons on the map, both obvious and (semi-)hidden, and both risky or tricky to get or right under your feet. There are magnums, snipers, rocket launchers, grenade launchers, turrets and a DMR. Besides many different weapons, there are also different tactics to utilize in each holdout area. Are you going to mass together as a pack, or split up and put a few humans on tactical positions on the side? Both strategies can work out and help each one of you to survive if you do it right. The fact that there are so many tactics and weapons to be used, guarantees a fun game everytime you play this map. I've tested it about 50 times (not even kidding) and I still enjoyed it when I was about to finally finish testing this map.
Thirdly, this map offers a theme you haven't seen before! It's a map that takes place in a favela, you don't see that very often. I've tried my best to make you feel like you're actually in a favela, but at the same time I kept gameplay in mind. Because of that, the map is fluent and easy to navigate, but still gives you a stacked, urban feeling as you climb higher and higher to the top.
Finally, this map actually works great with both huge and - and that's what's cool about it - small amounts of players. I found that the perfect amount of players lies around 9 to 13 players, but it will also support lobbies from 7 to 16 players. Make sure to put the initial zombie count to 1 though when playing with less than 9 players (8 players or less). Luckily you don't have to wait for hours until you've found enough players who have the Anniversary maps as well.
The phases
First phase - The roof terrace
You start off in a street on the ground level. On your left, behind the gate you can see the zombies running towards you from the wilderness. There's no time to lose, you have to make your way into the house at the end of the street. Don't forget to pick up a shotgun or two while running up the stairs, and settling yourselves on the roof terrace. Unfortunately there's no time to enjoy the sight right now.


Tactics?
In the picture below you can see an overview of the holdout area of phase 1. (Excuse me for my horrible Photoshopping skills, I'm still a rookie.) As you can see, zombies generally have two ways to approach you. This means that you have to guard both entrances in order to successfully keep off the horde. The green little box right next to the door can/should be pushed through the door in the hallway. That way, you'll block the road for the zombies and force them to jump over, requiring time. That time can be used to take them out. It is true that the zombies can also use the box as a cover to protect themselves, but usually they won't be able to get behind it unharmed, making it useless for them to do so.
Never get too close to the door. Eventually one of the zombies will be able to seize you and infect you as well, and you'll regret the fact that you took so much risk to get an extra kill now and then. Stay in the back and don't block the turret guy's sight.

While going up to the roof terrace, you'll be able to find a lot of shotguns on your way there. Don't forget to bring one with you! Shotguns are crucial to survive on this map, and even though you don't really need them yet in this phase, you will need them later on. By jumping up right after you entered the house, you can get yourself one that other players usually overlook. (see picture)

And now the most important tip of all concerning this phase: Push. Back. The. Crate.
This could be essential for the survival of all of you! By knocking back the crate with an energy sword like the guy in the picture below is doing, you'll restrict the zombies to one approach and give the human behind the turret the time to focus on them. For once, it turned out to be actually useful to me that humans can pick up the swords from fallen zombies, because you can get the job done a lot faster with a sword than with your bare hands.

Finally, don't stay behind when it's time to move on. After a while another zombie teleporter will open up, which will enable zombies to easily slay any camping players. (see picture)

Second phase - The dump site
After surviving the madness of the roof terrace, you can now proceed along the road to your next stop: the dump site. Climb the trash and settle down, the zombies can come from everywhere. Don't forget to keep an eye on the overgrowth on your left: it's a great way for them to sneak up on you.


Tactics?
First of all, when the timer for the first phase has run out and you are able to move on using the grav lifts, don't forget to bring yourself another extra weapon on your way to the next phase. Both grav lifts can lead you to extra weapons. When using the grav lift in the back, you should definitely consider either checking out the inside of the little building (1st picture) or jumping on top of it (2nd pic).


Then, once you reached the second holdout location, you can quickly get up to the turret by sprinting up against the leaning pallet (don't just walk, you have to sprint) and constantly pressing the jump button while doing so. (see picture below) That way, you'll get on the platform earlier than the other humans so you use the turret to back them up and kill the zombies chasing them.
Once you're up there, you can also chose to get yourself an extra magnum (or tell somebody else about its location). It's hidden on the rocky cavity on the other side of the stile, facing the turret platform. Just look for something white and you'll probably find it. You can just grab it if you keep sprinting through the air while jumping towards it.

Here's an overview of the second hold out area, again with all possible zombie approaches. (see picture below) In the beginning the zombies will be coming at you from where you first came from, and as long as you don't let them get to the pallet you shouldn't have a hard time surviving. After a while, teleporters will open up inside of the huge warehouse on your left, first the one on the floor level and later on also the one in the ceiling. It is important that you don't give the zombies the opportunity to sneak up on you from the left using the overgrowth, because then you'll automatically be focussing all your attention on the shrubs which will allow other zombies to run at you through the middle. Therefore, you need to have a strategy! You can either put one or two humans on the left guarding the overgrowth and have the rest take care of the middle, or you can all focus on the middle and simply make sure no zombies can get to the overgrowth. The choice is up to you.

Third phase - The alley
Now that you overcame the stink of the dump, you can fight the zombies through a more cramped way. But appearances are deceptive: if you don't put one of your guys in the little entry on the left (on the picture), the zombies will have a great way to flank and overwhelm you.

Tactics?
Zombies can appear from behind the huge rock formation in the picture above, so it's important not to hang around on top of the edge for too long, or you will get infected with ease.
Here you can see an overview of the third holdout area. (see picture)
This holdout area might look very easy, because the alley is very cramped and you seem to be able to just mow down the zombies, one by one. However, it's not that easy at all. As you can see, zombies actually have two routes to take in order to get to the end of the alley. The first one is the main one, which is guarded by the turret and consists of very open sightlines. However, the second one behind the pallet door is much more discrete and far more dangerous if it remains unprotected.

You would do very wise putting a guy in this little hallway, like the players did in the picture below, to make sure the zombies can't sneak up on you that easy.

Final phase - The market place
In this final phase, things will really get in a clutter. Not before was it so difficult to focus on all the possible zombie approaches without forgetting one. There a plenty of things that will make it a bit easier for you though. First of all, there's a cookable shotgun waiting for you on the picknick table. Getting there isn't without danger as the zombies can approach directly in front of you. After grabbing it, don't hesitate and get back to your original location. Secondly, there are also a DMR as well as a rocket launcher hidden on balconies. For these weapons goes the same: look behind you as you grasp them, and make sure your buddies got your back.


Tactics?
There won't be many humans left, whereas there are probably a whole lot of zombies, and there are now many places where the zombies can come from (see the picture below). Also, you're located inside of a little room, which causes a lack of sightlines and requires great teamwork. These factors combined make this phase the hardest of all.

I'll give you a few tactics on how to survive nevertheless.
First of all, it would be very wise to gather as many weapons as you can before settling down in the room. Did you bring any turrets to the third phase? Don't forget to take them with you! Did you already break off the turret from the third phase itself? If not, do it now! Apart from the weapons you can bring from previous phases, you should also try to get new weapons that will be at your disposal in this phase. After going up the stairs, take a look at your left to find another one of those sweet grey shotgun boxes. You can immediately throw the box itself down the stairs to slow down any zombies that will be trying to run up from there, thus killing two birds with one stone.

There are a few weapons in the room itself, but most weapons will be risky to get to. This doesn't mean you should forget about them, though. Like I said, the more weapons the better. For example, there's a shotgun waiting for you on the picknick table. It's not so hard to see, but going over means that you'll get extremely close to one of the zombie teleporters directly in front of you. Besides, you also have to go back after you took it, which means you'll need someone to watch your back if you don't want a zombie to assassinate you in an unalert moment.

And here are three more pictures of (semi)-hidden weapons on the map that you can try to obtain. Because the pictures speak for themselves, I won't comment on the weapons any further.


Secondly, it will increase your chances of surviving this last phase as well a lot if you divide the tasks. Put one guy (preferably someone with a lot of shotgun ammo left) at the stairs, to kill all the zombies that try to get up. Don't forget to push the box down to make it easier to do so. Have someone else watch the little opening on the left, next to the barricade. (See picture below, on the right) Some zombies manage to get in using various ways. You are going to want to kill those zombies before they get in. Stay focussed though, or this might happen to you. (second picture)


Good luck surviving in this hot tempered map, in the thread on ForgeHub are some more pictures for your pleasure!
-
Great map, I've always liked the aesthetical looks. The fact that this map supports both big and small lobbies is also very neat, no matter how many players you have, you can still get great games going on this one. There isn't one clear stronghold present and that's a strength of this map. The more natural a stronghold, the better I like it. Great job Beybok!
-
i never watch that video before
I find that a bit hard to believe because it is literally the same, but oh well. Next time when you use something pre-built, just try to add some more creative and unique features so it distinguishes it from any other map.
-
2
-
-
Why did you literally copy the first area from the example map by Oakley?
-
1
-
-
The map is pretty cool indeed, but the thing that bothers me is that except for some of the easter eggs and perhaps the basketball field, you didn't offer anything original. What distinguishes this map from any other linear map taking place in a city/sewers? What makes potential downloaders want to play this map more than other silimar maps? Keep in mind that originality isn't solely based on the location of the map. There are tons of ways you can put originality in your map, such as gametype customization or gameplay style. You should really try to focus on that, as it is essential to win the public and make them want your map.
-
I'd put up the video from the PFL Customs Night too, it shows the layout of the map really well.
-
Hey REMKings, I remember seeing this map on ForgeHub. Great job on it! The atmosphere is very convincing and the environement is astounding. Even though this is not a linear infection, it really tells a story about the area in which the humans find themselves. As usual, a pretty freaking amazing map. Keep up the great work, you're one of the best infection forgers I've seen!
Thanks man, I try. I have a few projects rounding up such as Favela Run, as well as some pretty interesting ideas for Infection maps in Halo 4 (originally for Reach but it ain't worth it anymore), so stay tuned I'd say! =)
As a matter of fact, I'm currently finishing a concept that might just change Linear Infection for good....
-
I was able to play on this and it was a really really cool map. The aesthetics were nice and clean. Exploding falcon at the beginning was great and the hold out area at the end with the scrawled messages was a nice touch. Gameplay was also pretty good and shows a clear understanding of how to build these types of maps well.
I would just say that there should be maybe a couple changes to the map before we feature it.
1. there should be a loadout camera which there wasnt (at least in the version I downloaded)
2. humans had a very difficult time getting to the end
The zombies spawned close to the beginning but this want an issue. What was is the fact that from their spawn they could easily get past the humans from the rooftops and camp around the corner of the path. Alot of the times the zombies were able to always be on top of the humans. Along this same type of problem was the teleporter system. It was well designed but sometimes seemed to give the zombies too much of an advantage. The prime example of this was the one way shield door area. Once the humans are allowed to go though the zombies can immediately spawn on the other side of the door. This seemed a bit unfair and made it very difficult for humans to survive.
I would say that you should maybe limit the zombies a bit in the beginning. Not the initial zombies but upon respawn the zombies should be forced to chase the humans down the path rather than jump ahead of them. While this may make it hard for the zombies to push forward you could maybe place the first teleporter in such a way that it allows them to move up and place the zombies in such an advantageous position that the humans must fall back. (we had issues of humans standing in the beginning and camping with all the ammo they got rather than progressing)
You should maybe also shorten the map a little bit so that when the humans get through the shield door it isnt at the same time that the zombies get their final teleporter. Maybe limit some weapon ammo as well.
Otherwise ****** awesome map man, hopefully this feedback helped
I'll feel free to reply for Berb and cover your issues above, because I helped him testing this map and got to learn the mechanics of this map, such as why it is so difficult and why zombies have the opportunity to drop down on the humans.
To save myself time and to stay close to the source, I'll just quote Berb himself here and I go into more depth on why I love this map over here. I'd read both comments Oakley.
(To sum things up: Get to know the map as how it's supposed to be played (by checking out the links above), and you'll absolutely love it.)
-
There are some bumps in the map that annoy me but I don't know if they are with the authentic destruction of the city or just a little lightly done on them. Can you settle my mind by telling me which is it.
I did that on purpose, I wanted the driving to be tricky and challenging. For infantry it can be a bit annoying though so you'll want to avoid those bumps.
(Believe me, I'm too much of a perfectionist to make untidy maps. Although I'll admit that I didn't do as much on it as I would have if it were to be a racetrack.)
-
Gamertag: REMkings
Map: Deadborough
Gametype: zm_Outbreak
Recommend player count: 10-16 players
Deadborough
By REMkings
A city, shattered. The ever enduring civil war had taken away everything that was once beautiful about this obsolete English town. Many men had died, many others had fled the place when they still had the chance. For a reason unknown to everyone, the civilians had been killing their former brothers and fellows. Little they knew, there was something far more dangerous approaching them in the shadows... Heavily outnumbered and unfortunately trapped in this ruined district of the city, they have to work together this time in order to survive this awakening undead madness!

Hello Julien and the rest of the THFE crew, and hello loyal THFE subscribers! Welcome to my latest completely finished Infection map, and my first THFE submission using this new 343i-related format! I am here to present to you the map Deadborough.
Deadborough is the name of the infested city district in which the players may roam about and utilize numerous buildings, weapons and other resources to increase their chances of survival. Find your way in the many buildings, each of them offering a unique set up and play style. (I'll cover them in detail elsewhere in this thread.) Or get yourself a seat in either the warthog or the mongoose, and race through the streets, fly over the jumps and rattle over the many bumps and cracks in the road. Indeed, the map offers both vertical and horizontal gameplay: You can climb the many levels of the buildings or drive around in the beloved warthog to slay off the swarming zombies. It's all up to you and your comrades. Teamwork is greatly recommended if you want to live longer or even make it to the end of the round.
Keythings
I wanted to create a city map with nothing but accessible buildings, while keeping a realistic and ruptered feeling that suited the background story well. I focussed heavily on making the gameplay very vertical, because I haven't seen that being done a lot before, even though it actually makes sense to go to the top of the building and only having to look down. However, don't get me wrong, this map is not campable. Every room has multiple entrances that can't be guarded all at once on your own. You will need other players to help you survive. I also tried to implement fear into this map (though definitely not as much as in LSIALM) and to stimulate the will to make it through unharmed. The placement of the zombie teleporters adds to this greatly, because you never know when they are going to come and where they'll be coming from.
The buildings and strongholds on the map
There are five main buildings in this map, each one of them being accessible to players and containing all kinds of weapons. I'll cover each one of them here.
The Tower
The Tower is by far the tallest building on the map, making it a highly appealing and very useful building to enter. The building offers numerous weapons, such as a sniper and grenade launcher and a few shotguns. It is also one of the two buildings on the map with an accessible roof, and the only one with a flat one. Be careful though: there are two entrances so make sure to have someone watching your back. If you can get a couple of guys with you, this building is one of your best options if you want to stay alive.
The Office
The Office is the biggest building on the map. Among others you can find a turret and a magnum in this building. The top floor is a great way to keep off the zombies while being able to stay at a distance, making it a safe and well arranged stronghold. However, the tricky interior design still disables camping possibilities and makes you require one or two other players if you want to have a fair chance of survival. This allowed me to use only one entrance to the top floor, while keeping it balanced for both humans and zombies.
The Flat
The Flat is one of my favorite buildings on this map, because unlike with all of the other buildings on the map, this one allows you to switch back from "window to door" all the time. That is, guarding the staircase for a few seconds, and then walking over to a window or hole in the wall shooting at zombies passing by. It's the second biggest building on the map after the Office, and brings you a couple of weapons like a sniper and some shotguns. There's also a Harry Potter's closet sized somewhat hidden room, which can be a funny spot to take for the Last Man Standing, if he were to be in the Flat.
The House
The House is mostly used for the fact that you can climb the roof. The building offers a couple of weapons like shotguns and a turret. From the roof you can see most of the map, but you have to keep in mind that zombies can teleport very near to you, so if you want to have time to look around, make sure you always have a buddy guarding you and vice versa. The room inside of the intact part of the house is also worth checking out, especially if you can bring a few shotguns to the battle.
The Bunker
The Bunker is the least used building on the map, due to it's small size. That's a pity though, because it's actually a very neat building with entertaining gameplay. The Bunker offers several shotguns, and also a grenade launcher and magnum. It's located next to the Office, so you can also communicate with players inside of that building to get yourself some extra support. There are two entrances to the top floor, so make sure you don't forget about the not so obvious one. From the top floor, you can also quickly pick up some assault rifle ammunition from the little shack next to the building.
Driving the warthog
Using the vehicles on this map, such as the warthog, is definitely fun to do and worth giving a try. There are many, many routes you can take, and every part of the road is drivable in both directions. Make sure to watch your speed though when you drive, because the jumps can be a bit tricky and so can be the turns. (Yes, that's right, the road is so ugly on purpose.)
Here are a few pictures to give you an impression of what the warthog gameplay is like.


Finally, here's a review of the map so you can get an impression of what it looks and plays like! Thanks to Mr Pokephile for featuring my map even before it was finished
http://www.youtube.com/watch?feature=player_embedded&v=T-CtCLBMQ4A
Thanks for reading this thread, and I hope you'll like this map. It's not the best map I've ever built, I can honestly say that, - because that's probably Lone Souls in a Lost Mine - but it's definitely neat and it will take you quite a lot of games to play before you'll know the locations of all the weapons and strongholds! Have fun!-
2
-
-
Wow, lots of friends around here.

I'll add the two of you, oomish and Berb. And you know how I feel about this map, oomish. It's beast.
[FEATURED] Freeman Bay
in Flood/Infection Maps
Posted
"Morgan Bay, 1773. The ever so peaceful port now houses a horrible rebellion..."
Welcome to Freeman Bay!
DOWNLOAD LINK
Freeman Bay is the successor to my map 'Morgan Bay', a map that I forged back in Halo 4. Morgan Bay has proven to be one of my most popular maps to date, winning Best of Forge 2013 and making its way into Matchmaking.
Therefore it was only a matter of time before I would try and bring back the map, only this time giving it a face-lift using the amazing new forge tools.
This map supports from 8 all the way up to 16 players, but I find 12 players is best. It is to be used with the standard Infection gametype from Halo 5.
Inspiration
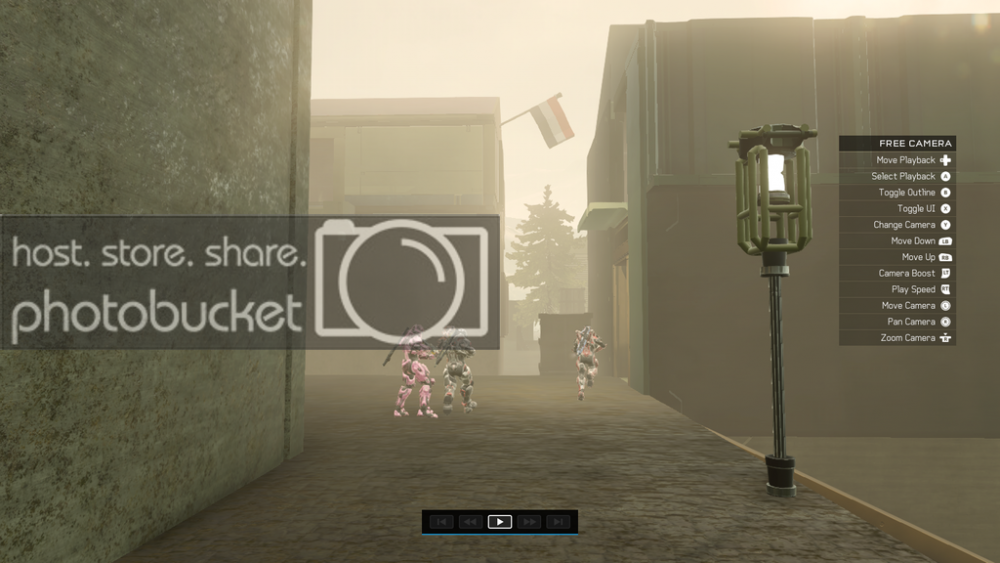
Morgan Bay was inspired by the typical ports you'd see in Assassin's Creed III. Obviously the same goes for Halo 5. I've gone ahead and looked at pictures from old Amsterdam as well, and hinted at this usage by implementing a Dutch flag in the map. I'm glad the theme is generally speaking instantly recognized, as I've had many people ask me if it was inspirted by AC3.
Philosophy
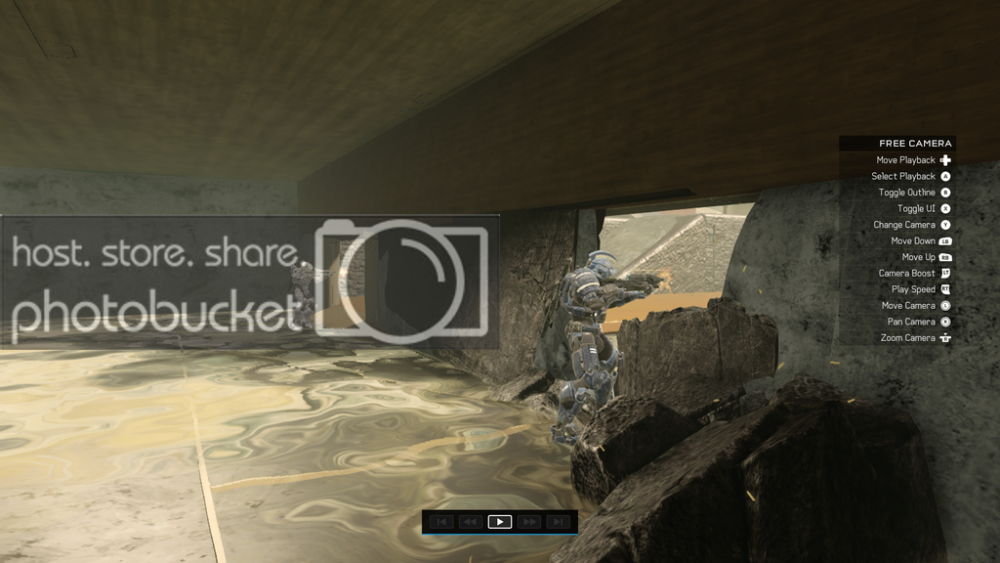
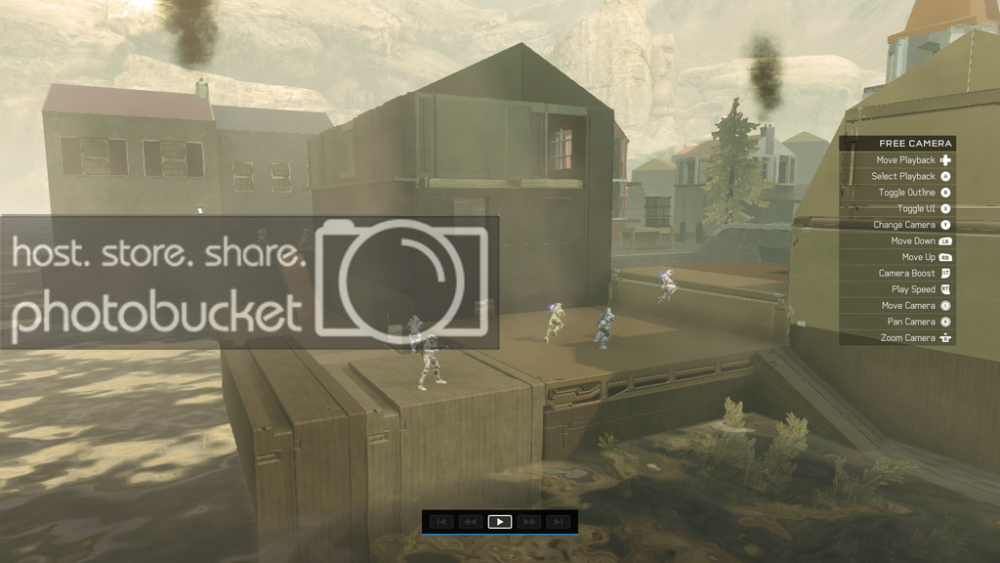
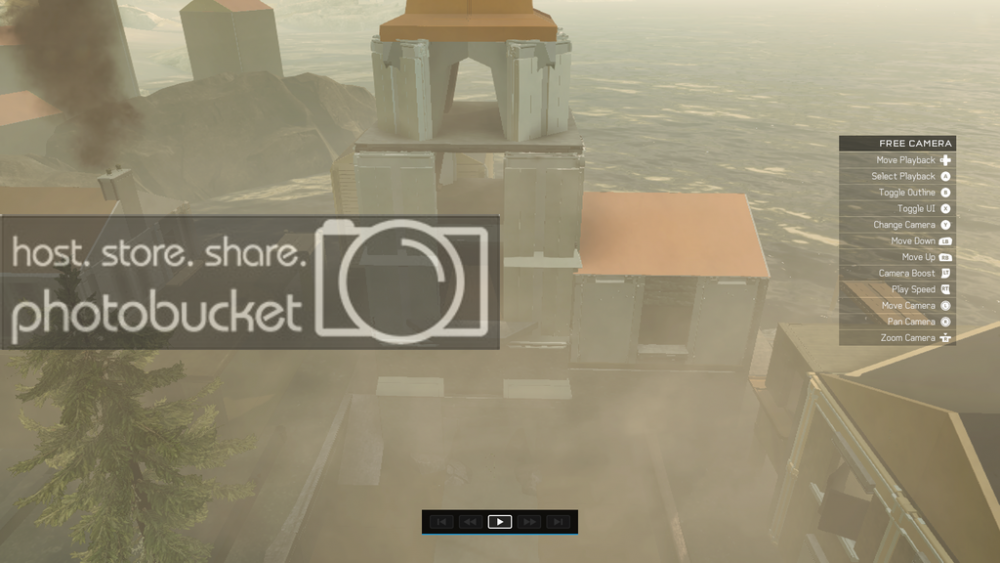
Freeman Bay, just like its predecessor, isn't just any map. Many, many hours have been put into improving the gameplay value and turning it into a fun and balanced map. As a result, the map has well balanced and interconnected holdouts that make for great flow. There are plenty of flanking routes and ways to quickly traverse between the separate areas of the map. Whether you're a human or a zombie, you're bound to have a great time on Freeman Bay.
Teamwork
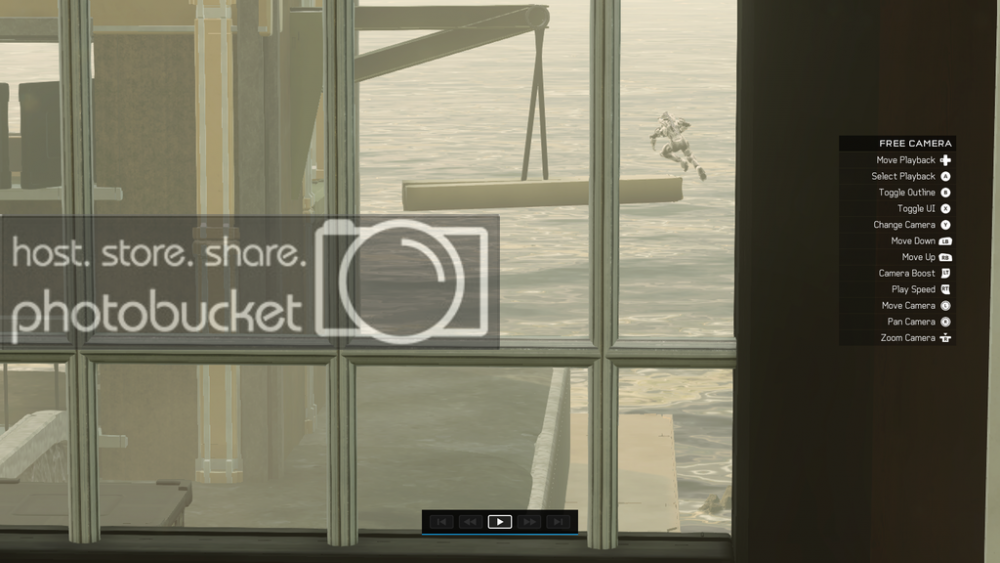
As I always make sure I do, teamwork is of tremendous importance on Freeman Bay and proves to be a necessary means to survival. The only way to see the end of the day is to team up with your surviving buddies and fight your way to victory.
This is brought into practice by the many buildings on the map that are all within each other's sightlines through windows and balconies. It is highly recommended you try and keep as many of your fellow survivors alive by supporting them from afar in defending themselves against attacking zombies. They will likely do the same for you.
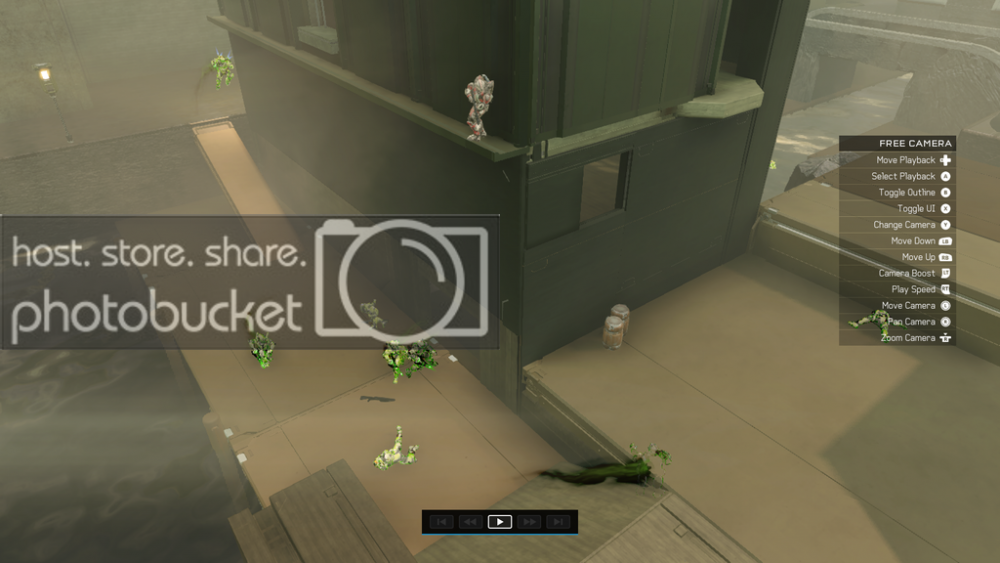
Additional Pictures
Epilogue
Thank you all for reading, I hope you like the map and give it a download! Let me know what you think down below and leave a rating if you will.
- REMkings
- Special thanks -
WARHOLIC
PA1NTS
WyvernZu
The 0micron
Auxi Klutch
CommanderColson
CANADIAN ECHO
Zandril S312
and the many others that helped me test this map once or more, gave me helpful feedback or simply expressed their thoughts on the map
= DOWNLOAD LINK =